

Photoshop’s tools frequently overlap, and a great example of this is Luminosity Masks vs Blend If. Both can be used to do the same thing, but they work in slightly different ways. This useful tutorial breaks down the differences so you know when and how to use each tool.
This Photoshop tutorial comes to us from Blake Rudis of f64 Academy, who says he’s asked this question a lot: “Blake, what is the difference between using Blend If and Luminosity Masking?” He hears this so often that he decided to put together a demo that will let him both show and tell you the differences.
The basic text explanation goes something like this:
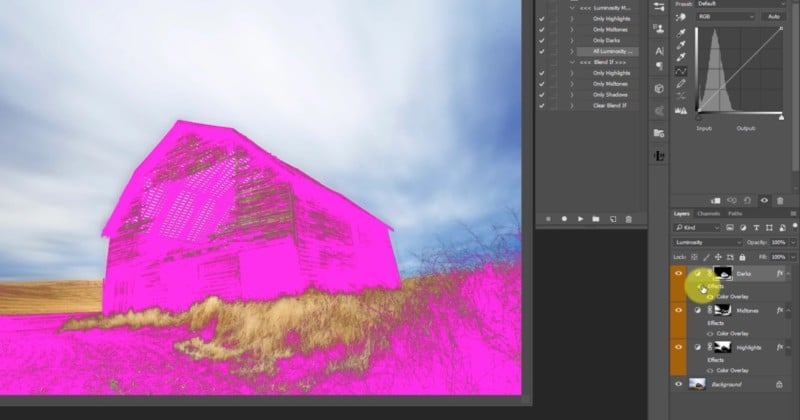
Luminosity Masking is a snapshot of a selection while Blend If can be used to make the same selection but will hybridly change based on the luminance values below it.
Unfortunately, that typically makes Blake’s audience glaze over and start thinking about their weekend plans… or lunch. That’s where this video comes in. In it, Rudis explains the basics of editing with both Luminosity Masks and Blend If, and then highlights exactly how they behave differently by editing an image using both.
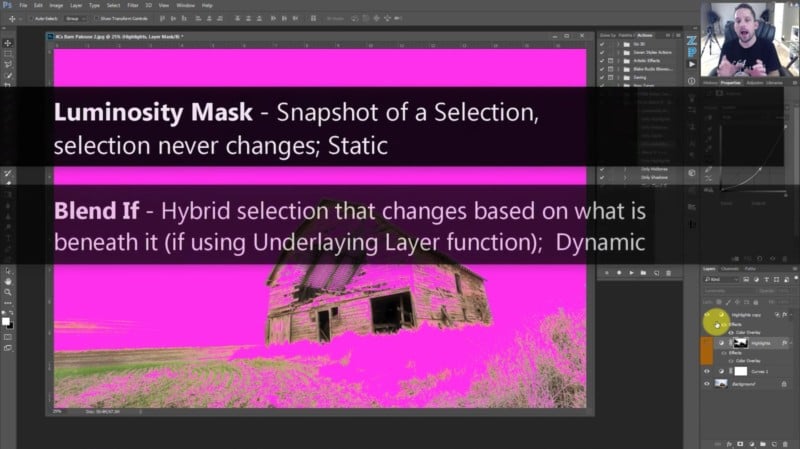
In the end, the difference boils down to the two statements in the screenshot above, which also explains why you want to have a good grasp on both tools. One is not better than the other, they are different and can even be used together to give certain tonal ranges extra “protection” from underlying edits.
Blake’s detailed breakdown is very useful. If you find yourself using luminosity masks or blend if a lot (or staying away from either because you don’t understand them) you’ll enjoy what he has to teach. Check out the full video up top, and then give this link a click to download his free Blend If and Luminosity Mask actions.
(via ISO 1200)


