

Adobe is getting creative on Instagram. Taking advantage of Instagram’s new ability to publish multiple images and video in a single post, they’ve created this simple, step-by-step tutorial that will show you how to create a ‘double exposure’ in Photoshop.
The tutorial was created with help from photographer and retoucher Ted Chin, whose talent is indisputable… just take a look at his Instagram account.
The tutorial is live on the Photoshop Instagram account, where you can swipe through for a step-by-step demonstration and read the full instructions in the caption. Check out the tutorial below, and then keep scrolling to read the caption/instructions:
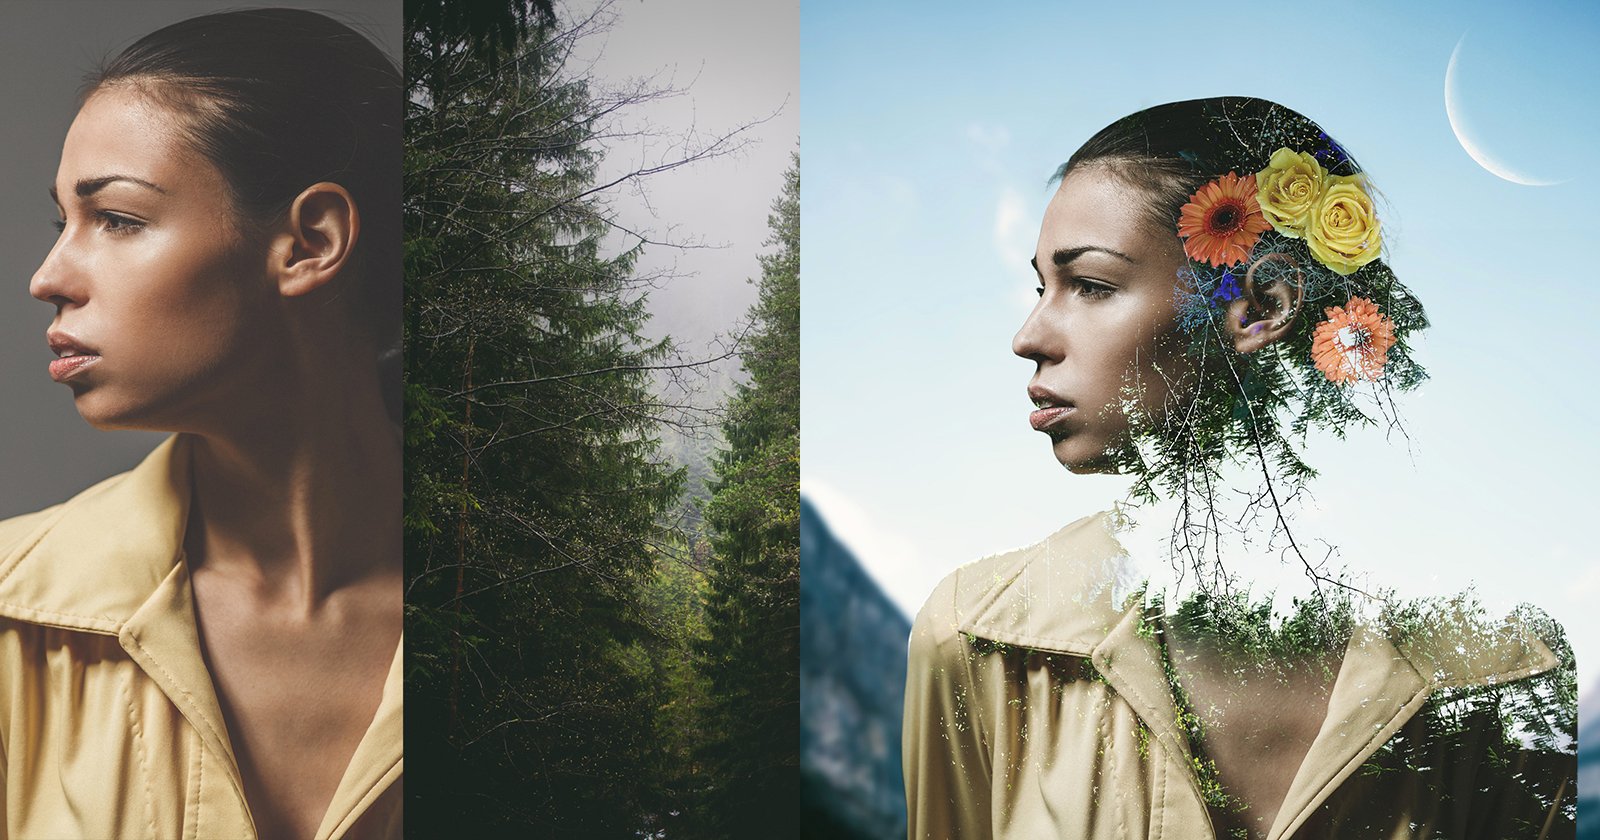
Slide 1: Hey guys! It’s Ted (@eye.c) here. Today I’m going to show you how to create a double exposure portrait in just few simple steps. Swipe through to see a mini-tutorial!
Slides 2 and 3: Using photos with simple backgrounds will help with the masking process. First, open the portrait (base) photo in #Photoshop. We are going to mask the background out and create the double exposure effect with the shape of the model.
Slide 4: Use the magic wand tool (W), click and select the background. Go to Select -> hold the “shift” key and click “Select and Mask”.Smooth the edge with the “Refine Edge Tool”, then click ok.
Slide 5: Click on “Add a mask” then, “Create a new layer.”Move the new layer to the bottom of the portrait.Select the “Paint Bucket Tool”, or press “G”, and fill in the white background.
Slide 6: Paste the second image, and adjust the image with “Levels” (Ctrl + L). Make sure the adjustment layer is clipped to the second image only. We want to make sure the sky is bright/clean enough so it’s easier for selection.Hold (Ctrl + left click) on the portrait’s mask we created earlier, then create a new layer mask for the landscape photo.
Slide 7: Un-link the mask by clicking the symbol in between, and re-adjust the landscape photo to the way you prefer.
Slide 8: Duplicate the Portrait layer and move the copy to the top of the landscape layer. Then change the blending mode to “Lighten”.
Slide 9: I decided to add other elements (flowers) by using the same blending mode (Lighten) from the last step.
Slide 10: If you think the white background is too boring, you can try to add a different background, too.
And this is how you can create a simple double exposure portrait!
Credit where credit is due: this is a creative, novel way to present a tutorial. We wouldn’t be surprised if this becomes commonplace, creating 10-step tutorials and posting them as videos on Instagram. What Photoshop technique would you like to see demonstrated next?


