

Taking pictures out of a helicopter is one of the greatest and most rewarding things I’ve done as a photographer. It grants you access to unparalleled views that you would never see otherwise.
I’ve had the pleasure of doing helicopter flights in Iceland, Toronto, New York, and Seattle; as well as a photography flight around downtown Toronto. In this time I’ve learned many things that would help anyone about to venture out onto their first aerial photography flight!
1. Proper clothing
This one may seem obvious, but is so essential if you want to focus on taking good pictures. For your flight (especially if your helicopter is open door), you will want fitted clothing that won’t fly away, with more warmth than you may need at ground level since it gets windy and cold when you’re up there.
Gloves are essential in any cold climate flight as they help keep your hands focused on taking pictures and not losing feeling, all of which will contribute to a happier
and more successful first flight.
2. Battery and memory cards
Being sure that you have a clear memory card and a full battery is crucial to enjoying your flight. On one of my flights I forgot to switch out to my larger card and ran into a full card during my flight; not a fun surprise to have.
3. Think of the different perspectives you want to capture BEFORE takeoff
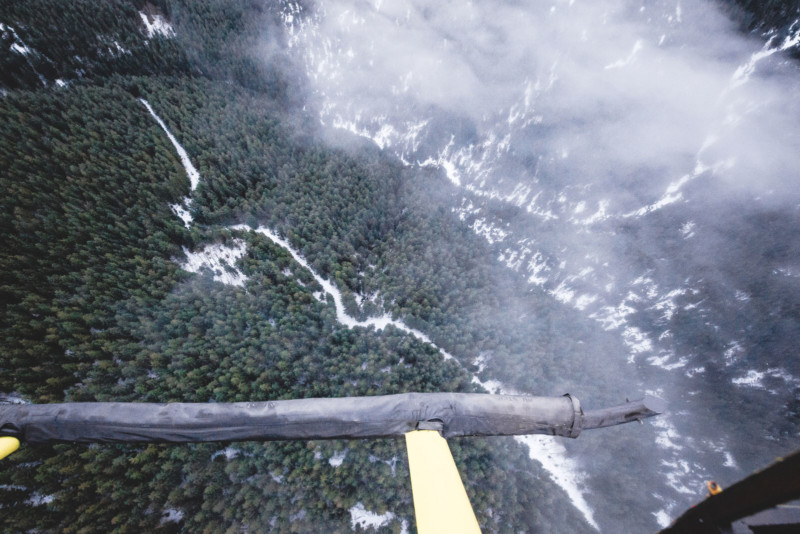
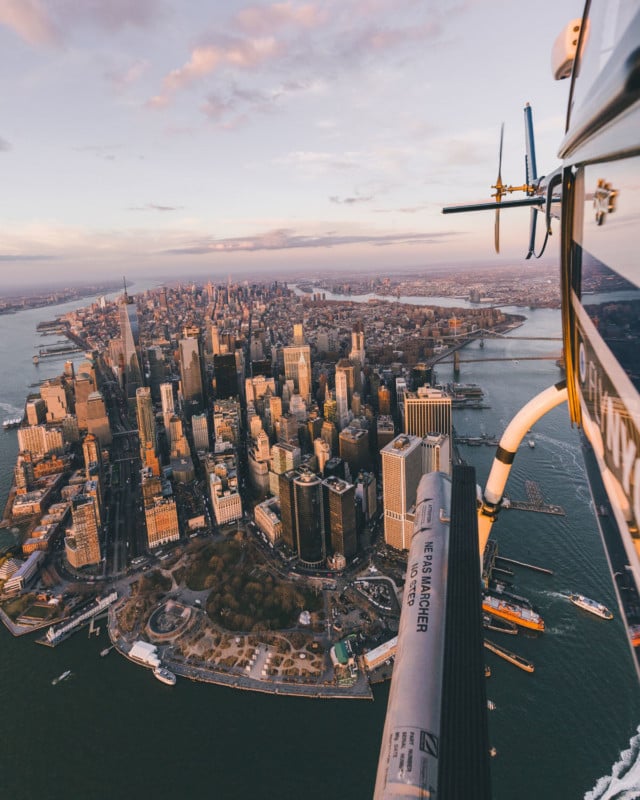
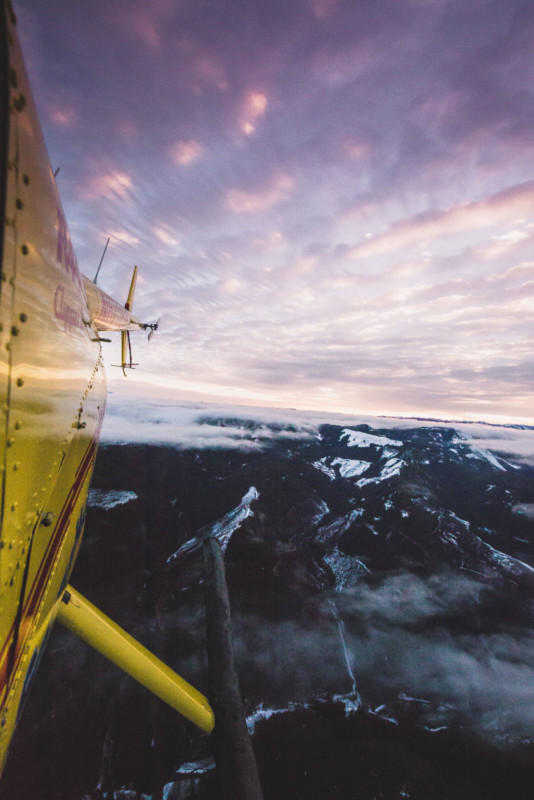
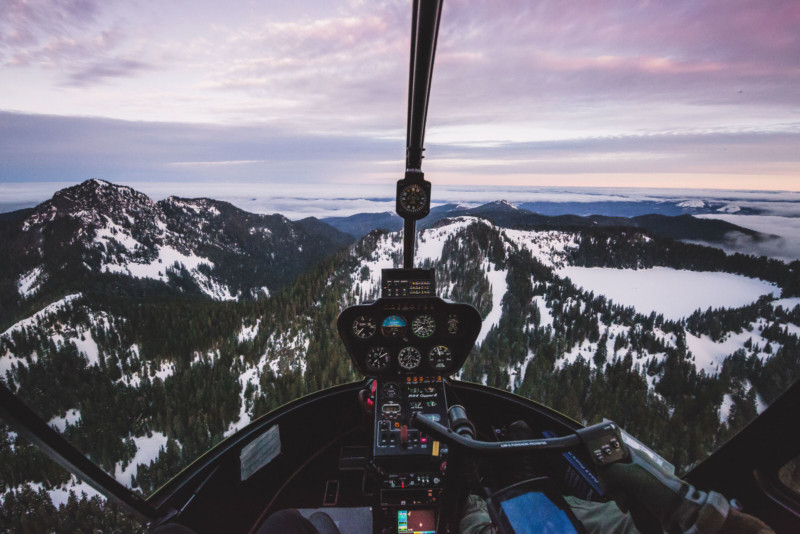
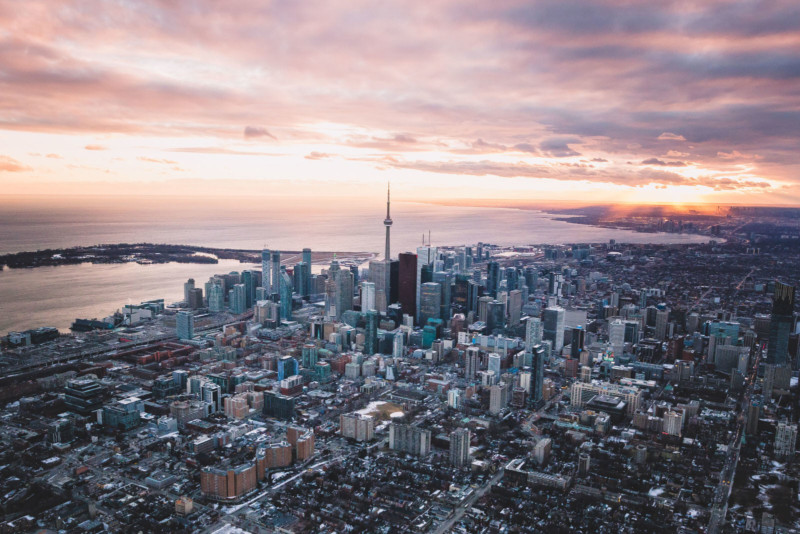
There are many shots that you can get out of a helicopter, and since you will be moving fairly fast and likely filled with adrenaline; it helps to visualize some general ideas of what you want beforehand. Some of the classic shots include lookdowns from above, dashboard shots, rear propeller shots, and of course regular landscapes from out of the window/door.
As the second part of this, try to be unique whenever you can! As helicopter tours lower in price, more and more people are doing them; thus producing a lot of typical shots. Try to mix in your own perspective while up in the air for a more unique shot and a chance to really have your aerial work stand out. Once up there, keep your camera in burst shooting mode so you don’t miss a moment.
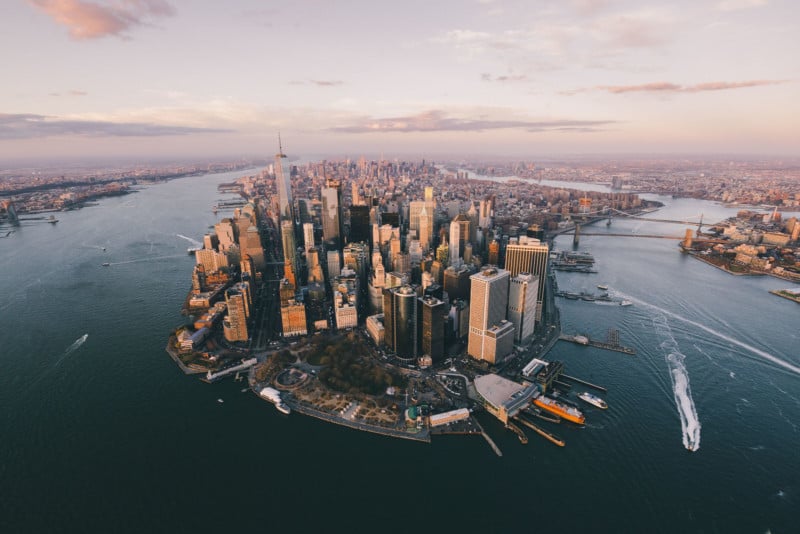
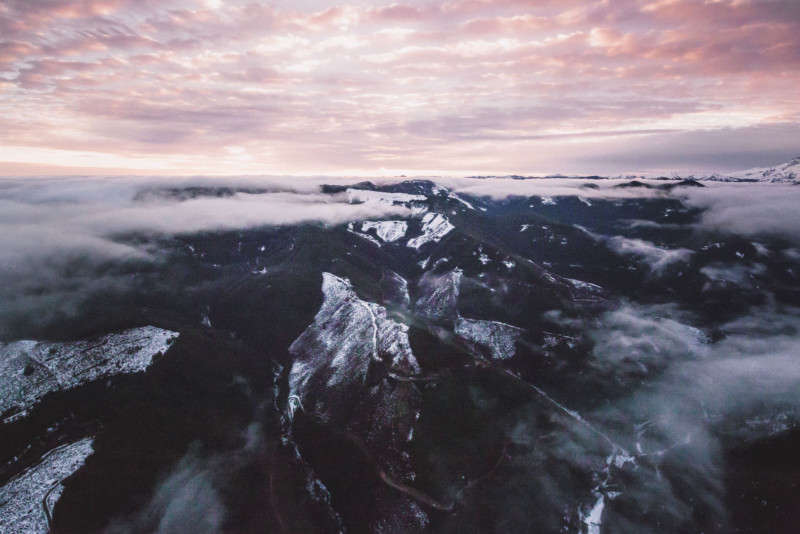
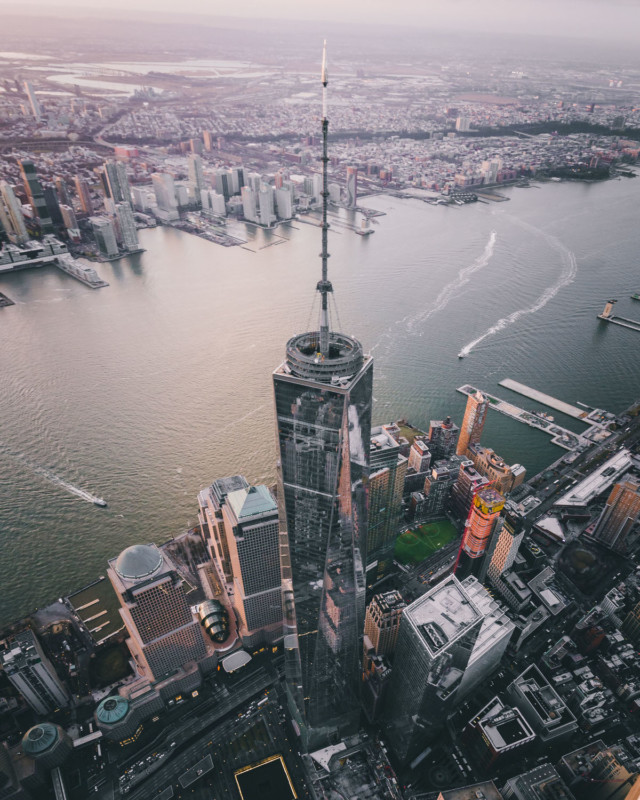
Examples of some perspective shots you can take:
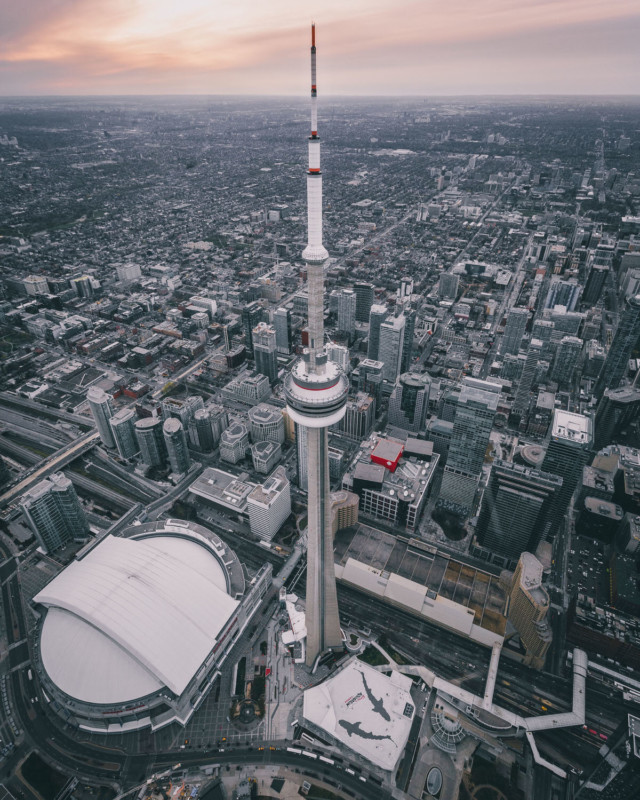
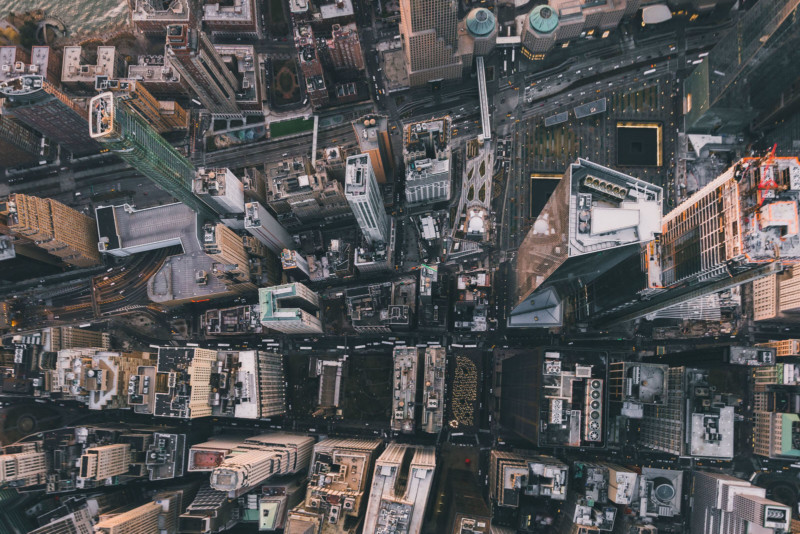
Lookdown Shots
Rear Shots
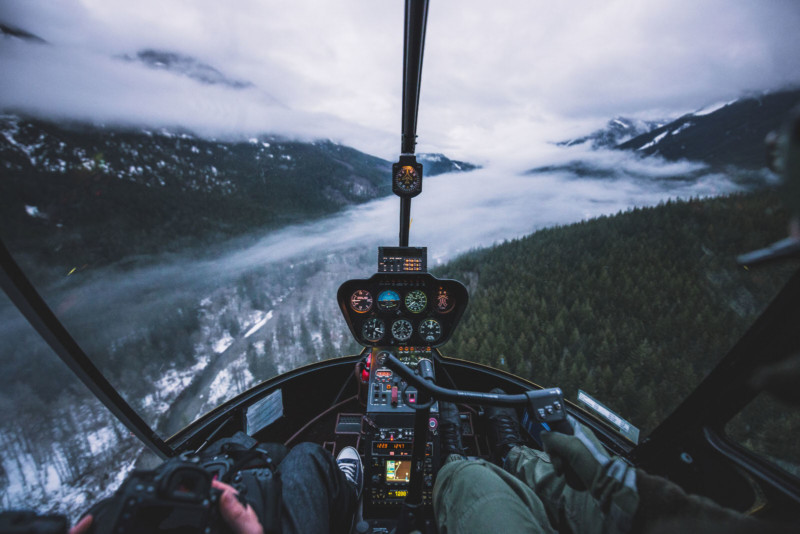
Dashboard Shots
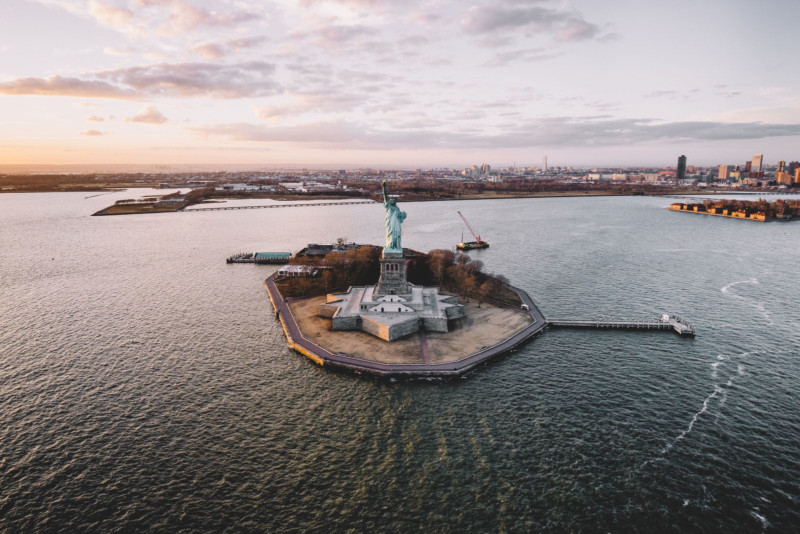
Landscape Shots
4. Speed of the copter and settings
You will want to set up your camera the best you can before you depart. This for most people will mean using whichever camera mode you are fastest in (for me it is aperture priority as the light conditions may be changing frequently), and bumping your ISO up as to avoid motion shake.
Remember that you are in a moving vehicle, so to have clear shots you will have to compromise to a degree. You will need to find the right balance between your f stop and your ISO, which results in a higher ISO, usually 1000+, and lower aperture, which can go as low as 2.8 depending on the focal length and depending on the time of your flight.
What anyone can and should do as well, is tell your pilot if you are passing something in particular that you want to highlight, and they can perform a hover so you can get a clearer shot at a lower ISO/higher f-stop. This tip may be the most crucial part of the getting the shots you want, because you won’t be able to do anything with them if they are blurry or out of focus after you return.
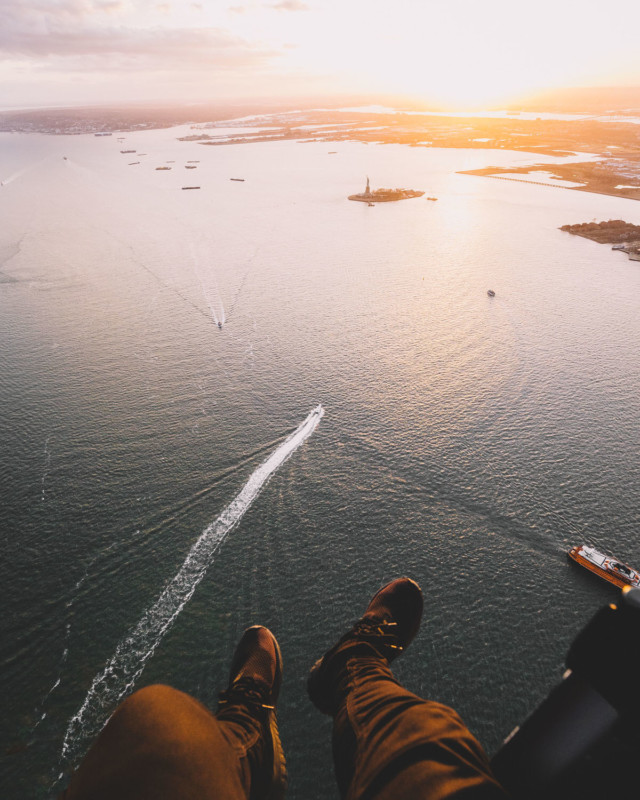
With an open door flight and a hover maneuver, you can even add your feet to the frame:
5. Understanding what you are getting with the flight
There are many helicopter companies out there offering tours, but of course not all are created equally. It is important that you understand, as a photographer, exactly what you are getting with your first flight. Some things that you should be looking for are flight duration, helicopter type, seating arrangements, doors on or off, and any restrictions the particular company may impose that could affect you. This will ensure you get the best value and best pictures in your flight.

6. Gear
You probably won’t want to be changing lenses while up in the air so many opt to shoot from helicopters with two camera bodies to get two different focal lengths. This is a great way to optimize your flight, but if you only have access to one body just pick whichever you feel suits you best.
Whether shooting with one or two camera bodies, most prefer to go wide angle and/or telephoto (such as a 70-200 or ultra wides like the 16-35). As an added bonus, having the stabilization feature on the lens itself is very handy in these settings if your lens offers it.
Additionally, If you are going to be shooting through a window, it is a good idea to have a polarizer filter to cut down on glare; and to request for a window cleaning before your scheduled departure if possible.
7. Timing of the flight
This may seem obvious, but it is crucial to consider the results you will achieve based on the time of day that you book your flight. Sunset flights are always in high demand, but perhaps a daytime flight with particular weather suits your needs best, or an epic sunrise flight. Know what you want based on the weather and the location you are photographing for a better flight.
All in all, aerial imagery can be incredibly captivating; and the process of going up in the helicopter or plane to find new perspectives is both an incredible life experience and highly addictive! If you employ the tips above before your first flight, I’m positive that you’ll capture some amazing images that will up your photography game and overall portfolio.
Get up, get creative, and enjoy the ride.
About the author: Alex Stelmacovich is a photographer based in Toronto, Canada. You can find more of his work on his website, Instagram, and 500px.


