

The world of analog photography surprises me a bit more every day! I recently read about a technique called Stand Development, so I have decided to try it myself. For those of who never heard of it before, let me explain you the differences between it and a normal development process.
When developing, as recommended by manufacturers, we are supposed to make regular agitations to ensure that the exposed film is always in contact with fresh developer. This is because the developer exhausts itself after a while and is no longer able to transform the particles of silver on the emulsion. Agitations also ensure that all the tonalities are evenly revealed.
On the contrary, stand development consists of letting the developer sit inside the tank with only one minute of agitation at the very beginning. Without movement, the areas that require more development quickly exhaust all the developing agent whilst it keeps acting on the less exposed areas that don’t weaken the developer so much. This has the effect of preserving highlights and revealing more details in the shadows.
On top of that, I see two other advantages that are directly linked with this lack of movement in the developing tank:
1. High Contrast
This is a question of taste, but I tend to prefer my pictures more contrasty, especially for black and white. I believe that it gives more character and help to hold the attention on the subject.
This is, of course, a personal opinion and it may not work with all styles of photography. The pictures below barely received any adjustments, and came out naturally contrasty. Fomapan is not known for having contrasty films—it’s more the opposite, they tend to offer more of a flat look.
2. Fine Details
Because the developer is not moving, the acutance is very high. If acutance is a new word for you, too, check out the definition here on Wikipedia. Basically, it makes edges very sharp between dark and bright areas, hence the increased sharpness. I was already very satisfied with the quality of the glass on my Hasselblad X-Pan but, as you will see below, the amount of details that came out from my last roll is insane… I feel like I have a new lens!
Another advantage is that it’s a low dilution process. With normal development, the dilutions are usually between 1+1 and 1+4. Here we are using a very low dilution so you can save a lot of developer.
Depending on the developer, you can dilute up to 1+50. This means that for 1 litre of pure developer, you can do 50 litres of developing solution! Considering that one roll of 35mm needs more or less 300ml of solution, you could develop up to 150 rolls… Knowing that one litre of developer cost in average $18, that’s a cost of less than $0.12 of chemical per roll!!
Before we conclude the math lesson, let me give you more information about the dilution I used.
The most common developer for this technique is usually Rodinal, which is diluted at 1+50. Here I only had Ilfotec DD-X and found that it should be mixed at 1+9. As I was using a Patterson tank with only 1 roll of film, I needed 300ml of solution. So I mixed 30ml of developer with 270ml of water at 20 degrees Celcius. Then I agitated for the first minute, tapped on the tank 3 or 4 times to remove air bubbles from the film, and let it sit for 45 minutes. After that, one minute of stop bath and three minutes of fixer. And that’s all folks!
Enough talk and math for today, let me show you a few images to thank you for reading until here!
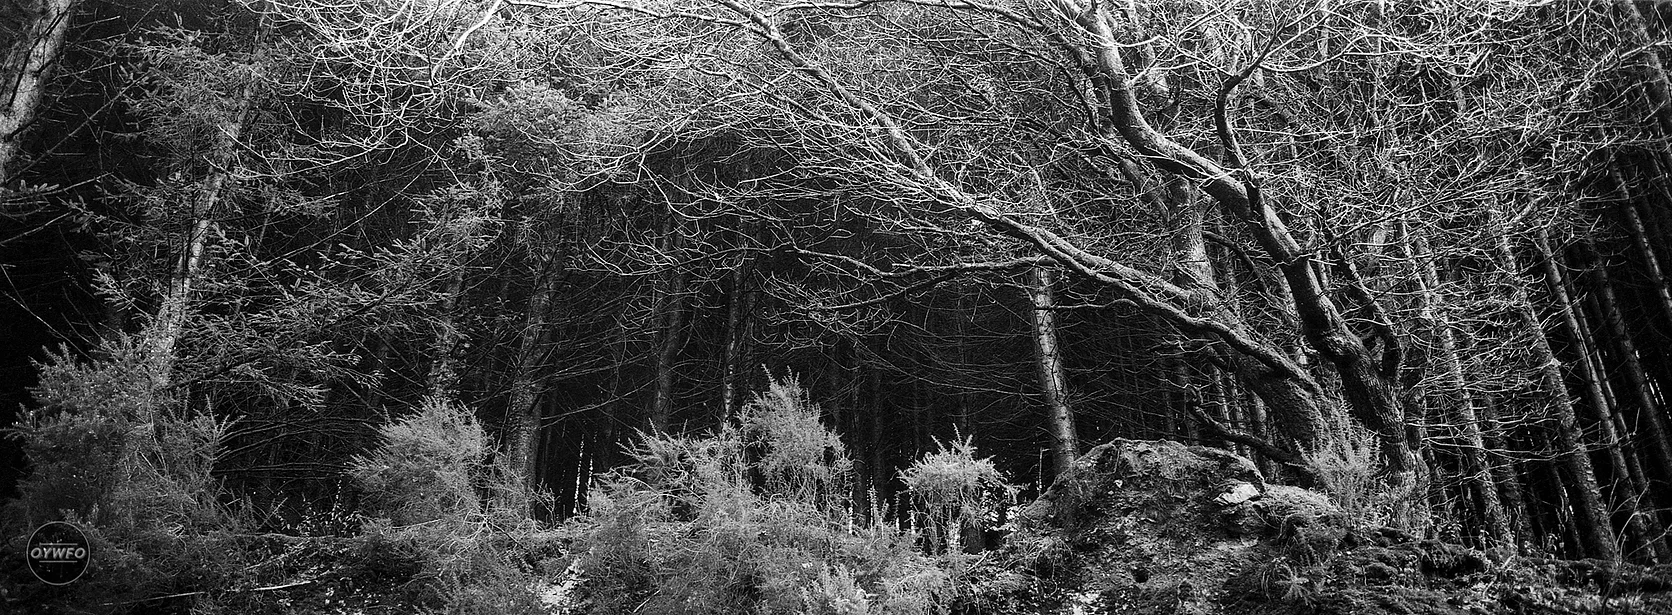
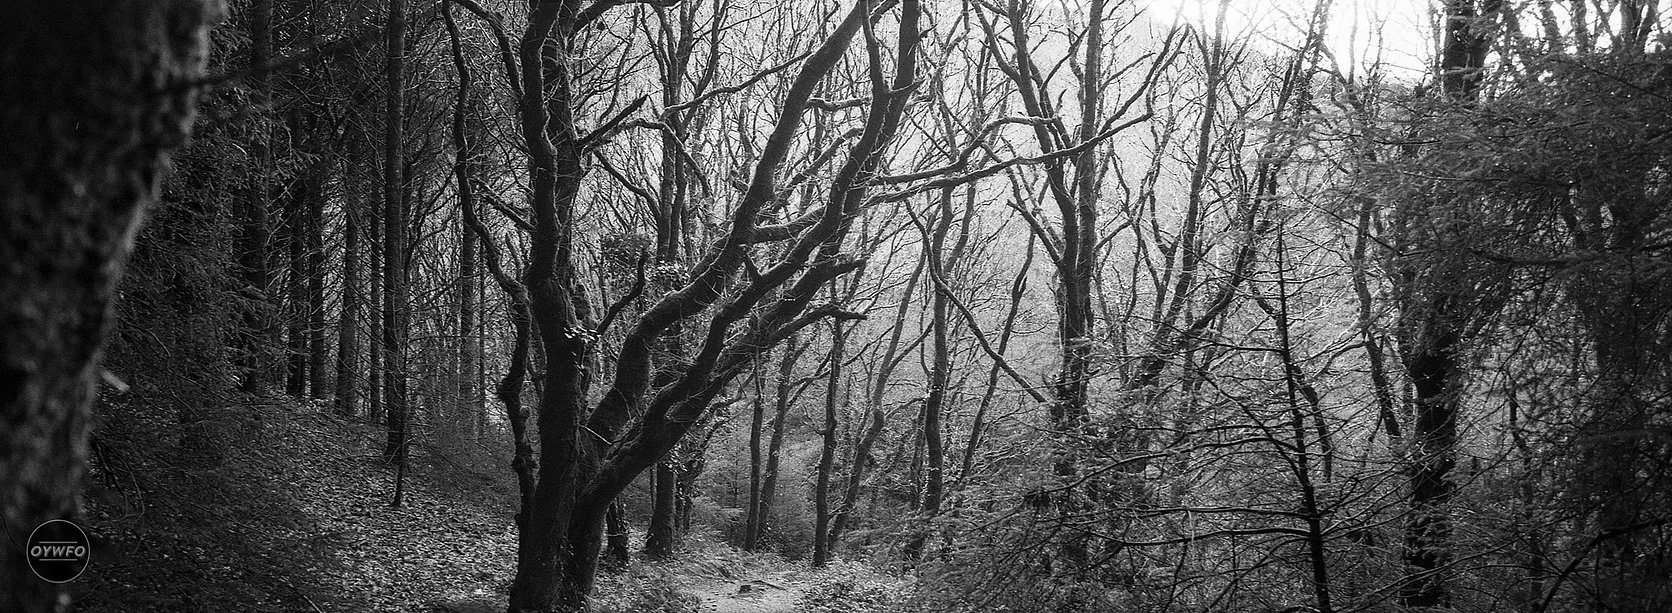
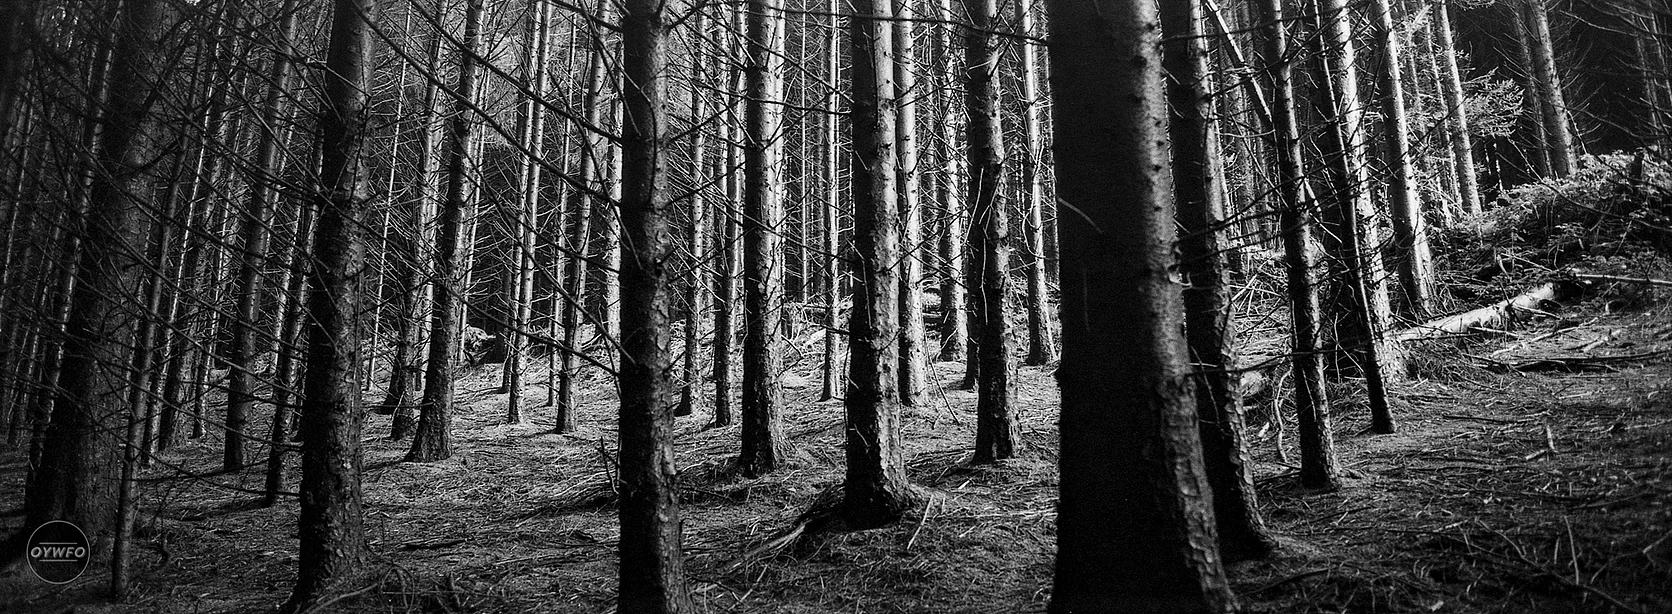
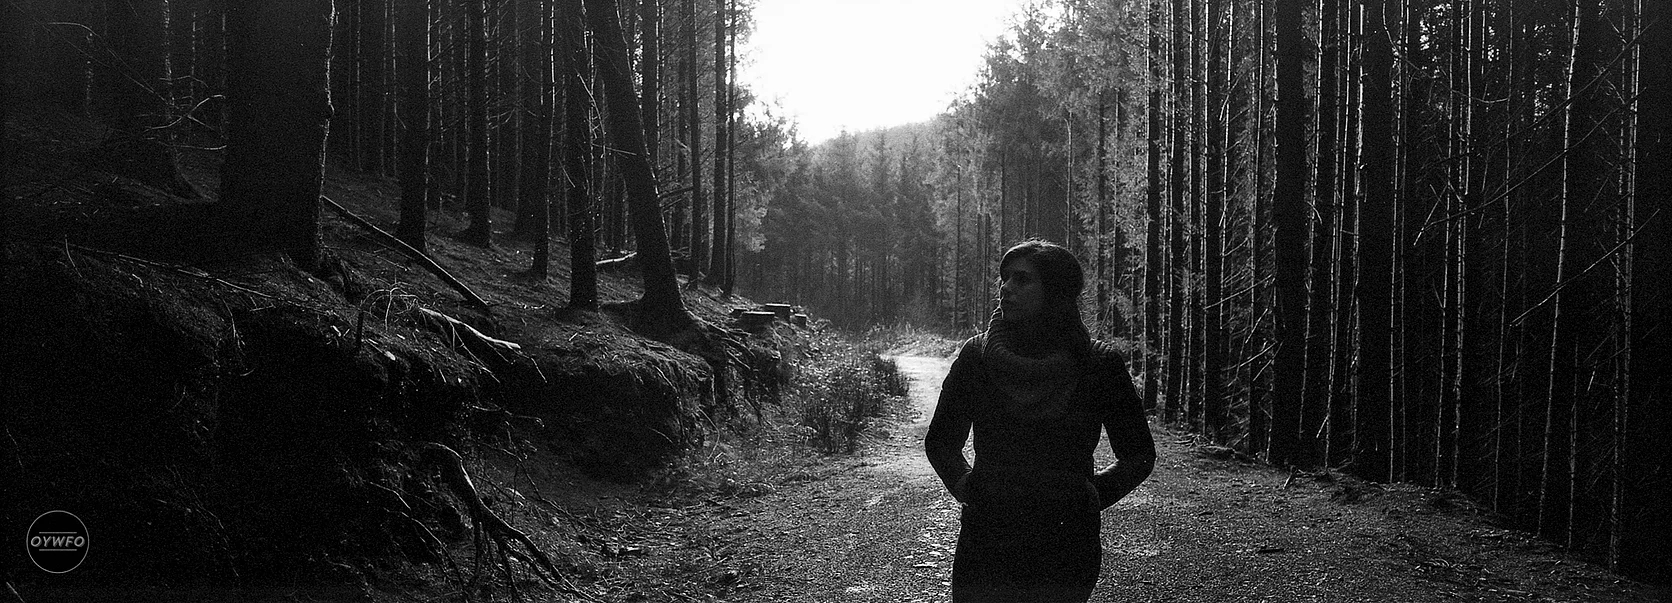
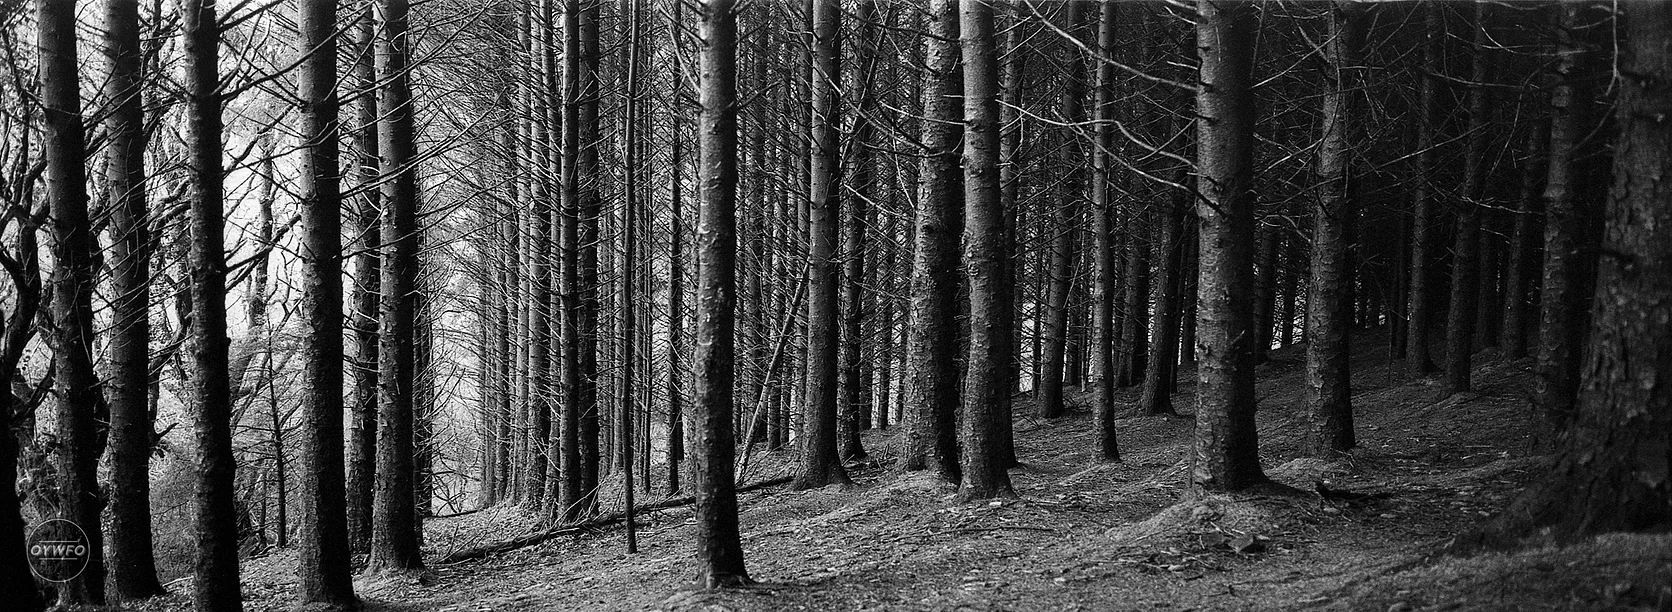

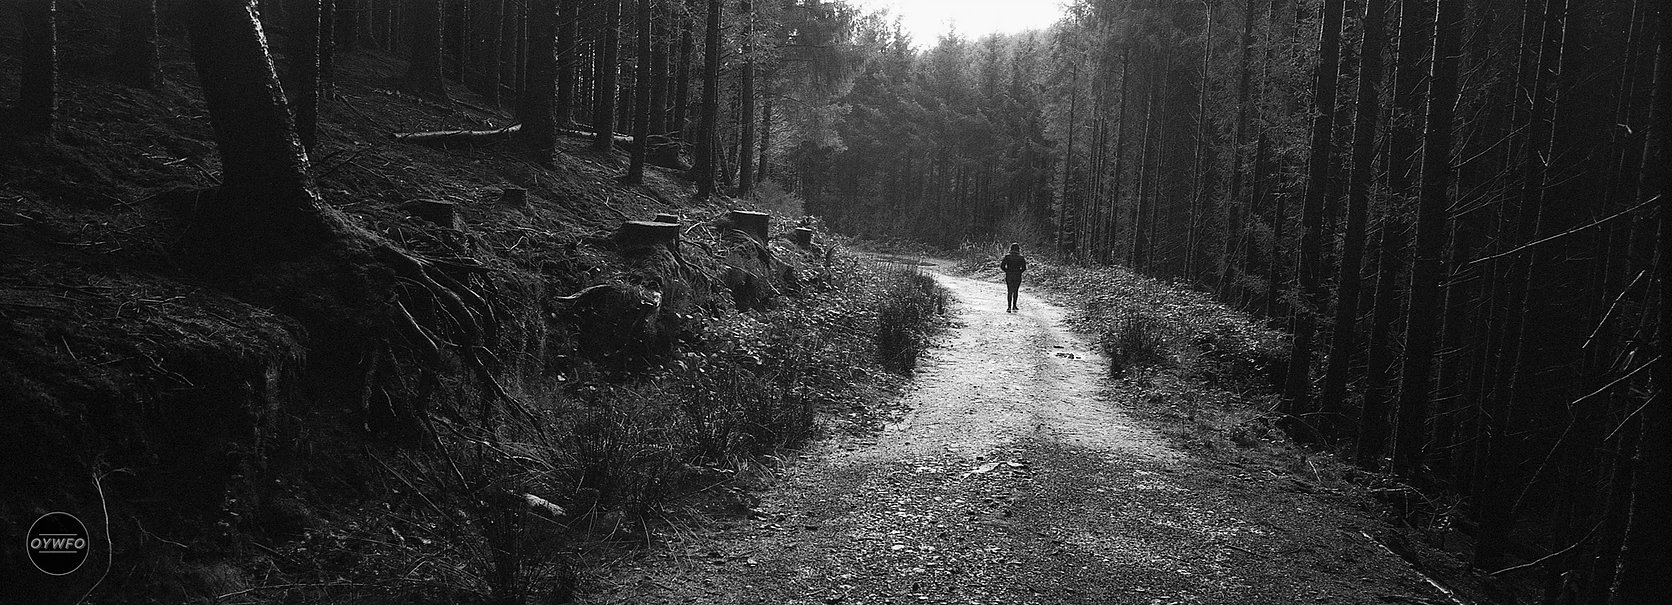
As soon as I saw the negatives, I knew that these images would turn out well (for my taste, at least). I have developed a few rolls already, but I’ve never seen a negative so dense and contrasty. Sometimes it’s hard to differentiate the shapes, but here everything was clearly distinct and sharp. The comparison with a normal negative of Fomapan 400 is unbelievable, it looks like I shot a completely different film.
The only downside I have found so far it is the time it takes. Some stand development can take one hour or more, so you have to be patient. But it’s the perfect opportunity to scan some negatives for example.
You’ll also read that some people have experienced uneven development or the apparition of streaks due to a chemical reaction at the bottom of the tank. This can be avoided by making one or two inversions mid-development, in this case we’re talking about semi-stand development. Personally, I didn’t notice anything strange, but it might have something to do with the low dilution I used, comparing to what it should be with Rodinal for instance.
Another important point to mention: With this process, you can mix two films that are rated at different speeds in the same tank. This leads me to think that it doesn’t matter too much if you pushed your film, but I am not sure about this and will have to do some tests to determine if you need to extend the time when pushing film.
I feel like I’ve just opened another door that will lead me towards more adventures in the film photography experience!
About the author: Vincent Moschetti is an Ireland-based photographer who is in the middle of a year-long experiment where he’s shooting only film photography. You can find more of his work or follow along on this adventure by visiting his website or following him on Facebook and Instagram. This post was also published here.

")
