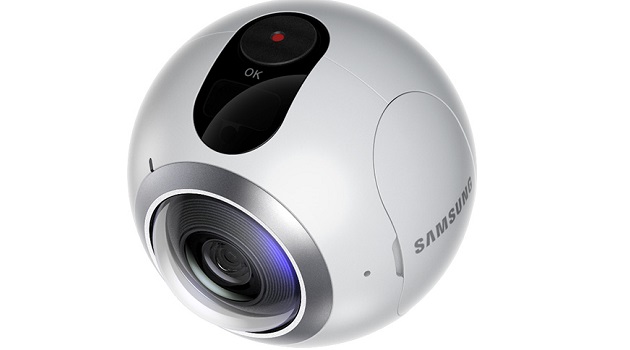
Virtual reality (VR) studios are rapidly creating new content for head-mounted displays (HMDs), from apps and videogames to 360-degree films. But to keep the industry’s growth buoyant more experiences are needed to continually attract consumers. One of the ways to do this is to get the public to make their own 360-degree videos, and companies have been facilitating this by releasing consumer grade cameras that can record immersive video. One of the most recent devices to hit the market is Samsung’s Gear 360, helping to complement the company’s VR line-up alongside Gear VR. But how easy is the Gear 360 to use and what are its features, VRFocus will now take you through the process.
So what is the Gear 360. Its a twin lens spherical camera that can record 360-degree videos and take 360-degree photos. It can be used just as you would a normal camera, just this time there’s no need to frame up as it records everything around you. The body is dust and splash resistant with an IP53 rating so its suitable for people who like to get out an about in climates that aren’t always suitable for technology.
Set-up
Taking the Gear 360 out of the box you’ll find the camera with a small three leg tripod attached, 1x pouch, 1x strap, 1x micro 5-pin cable, 1x battery, 1x Microfiber cloth and a user manual. One thing you’ll need to purchase separately is a microSD card to record the videos and images you want to take, it’ll accept cards up to 200GB. Assuming you’ve got a card to install open up the side panel to insert the memory card and the supplied battery. While the battery will like have some power inside it’s always best to charge it up first before properly using the device.
Switch it on by the power button which is on the opposite side to the battery compartment. Then its a case of connecting the Gear 360 to your compatible Samsung Galaxy smartphone either via Bluetooth or NFC. Above the power button you’ll find the mode selector. Pressing this will cycle through Time Lapse, Video Looping, Settings, Video and Photo on the small screen located on the top of the camera. This screen also shows battery life and the amount of recoding time or photos left.
Recording
Recording can be done in a couple of ways. Firstly there’s the fairly obvious record button on the very top of the device. Select which recording mode you want, place the camera on a solid surface or fold in the tripods legs to hold it, then press the button to start filming a 360-degree video. Or using Wi-Fi direct you can shoot in live view mode using your phones screen. From here you can tell it when to record and when to stop.
Content Sharing
After recording your 360-degree masterpiece the downloadable software will allow you to stitch and trim the footage to your liking before sharing it with the world. In the Gear 360 app select any photo or video you want then tap the share option. You’ll then be able to share the footage on any social media that supports 360-degree content, such as Facebook or YouTube. The files can also be transferred to your PC with the supplied cable.


