

I’ve been doing professional portrait and fashion photography for over 3 years now, but from the very beginning I have always considered myself an “aspiring photographer,” because you never stop improving and looking for new challenges.
There are a number of things that contribute to a great photo. Sometimes nailing just one of these things can carry a photo to greatness. Most photographers would agree that for a great photo you need:
- Engagement with the subject
- Thoughtful composition
- Appropriate lighting choices
- Thoughtful editing
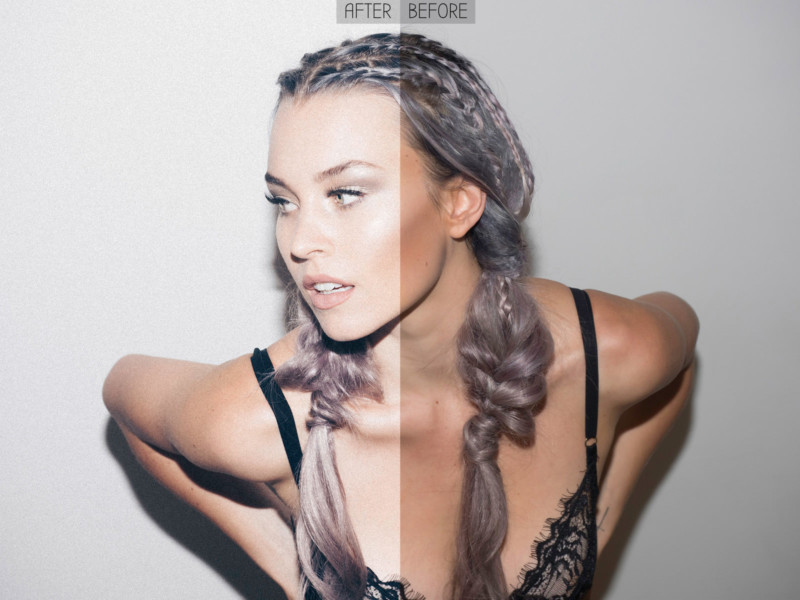
One of the biggest things I’ve learned in the last year is how much of an impact the editing process has, so I’ve written this post to share some of the before and afters of my work in the hope it can point other aspiring photographers in the right direction. This will be more of a visual demonstration rather than detailed instructions on how to use editing tools.
You may notice I didn’t mention equipment. You certainly need the right equipment for the job, and for specific purposes only certain specialized equipment will do. But remember these days you can still take a great photo with just about any modern camera, including the phone in your pocket.
My Workflow
Everyone has their own workflow that suits them best. Don’t let anyone tell you how you should work. But, if you’re curious, this is how I have found I spend my time most effectively. I’m going to keep it really simple…
I use Adobe Lightroom and Photoshop because they’re affordable to me. I also have a Wacom editing tablet for accurate touchups in Photoshop, but I very rarely need to use it for my photos.
My Process:
- I import all my images into Lightroom.
- I cull down to the top images that I want to edit and deliver to the model and other creatives in my team (through iterative flagging/starring of the photos).
- I choose an image which represents the average lighting conditions in the set.
- I create virtual copies and apply different presets to each copy to compare.
- I pick my favourite aesthetic, and apply to the rest of the images.
- I tweak each photo where necessary, then crop, spot heal and export at 2048px on the long end to share online.
If I have to, I may open Photoshop to:
- Retouch skin around the face if the lighting, resolution or editing has made it distracting AND it’s not what I’d consider a permanent feature.
- Content-Aware fill or clone out distracting elements of a photo that I should’ve tried to hide properly in the shoot.
And that’s it. In some cases I can cull, edit and deliver a shoot in 30 minutes. The longest time is generally spent culling!
Before & After Examples
What do my photos look like straight out of the camera? How do I get them from A to B? I won’t be going into the deep detail of every edit because I don’t plan the editing to such great detail on my shoots.
I know generally what I’m going for and choose my lighting carefully. When I’m ready to edit in Lightroom, I use presets I’ve created from previous shoots (which I’m always adding to). Then I modify them until I find something I’m happy with.
I offer some example presets of my own, and I personally got started with some great free presets from Nate Photographic.

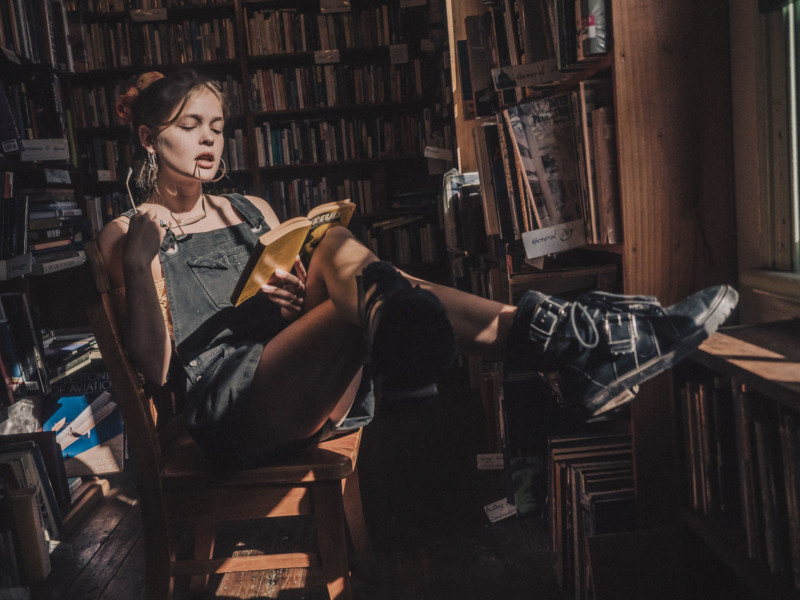
The first example is one with huge contrast between the light and dark areas of the image. I chose to capture the light coming through the window on the model’s face and therefore the highlights were the most important part of the image to me. I knew I was going to pull the shadows back up later, so I made sure I got all the detail in the highlights.
It makes it really hard to review the photos with the model along the way, because you can’t see much on the back of the camera. But it’s amazing what you can do with editing. In this example, I pulled back the highlights and whites and pushed the exposure, shadows and blacks. I used the tone curve to bring back contrast and adjust the tones, and made further changes in the HSL, Split Toning and Camera Calibration sections.
Finally, I love to apply a bit of grain which does a great job of hiding distracting details and reducing the likelihood I’ll need to do any retouching in Photoshop.
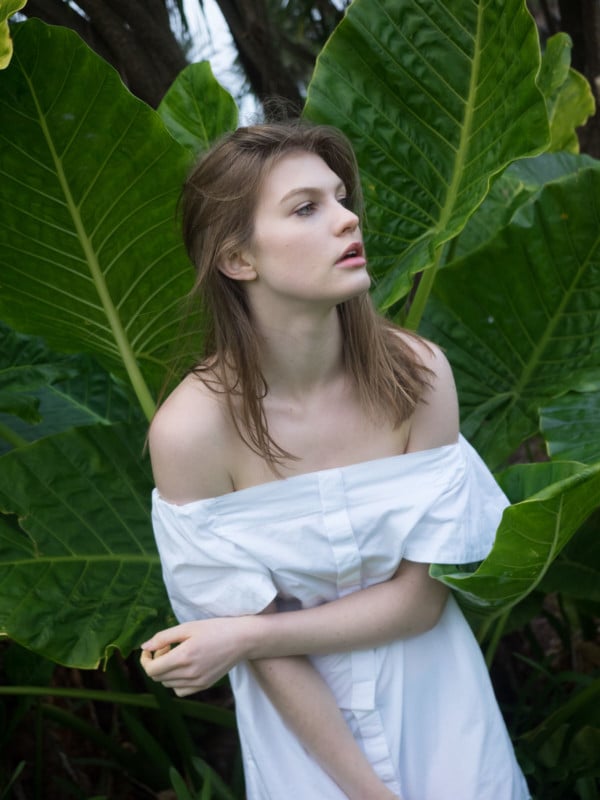
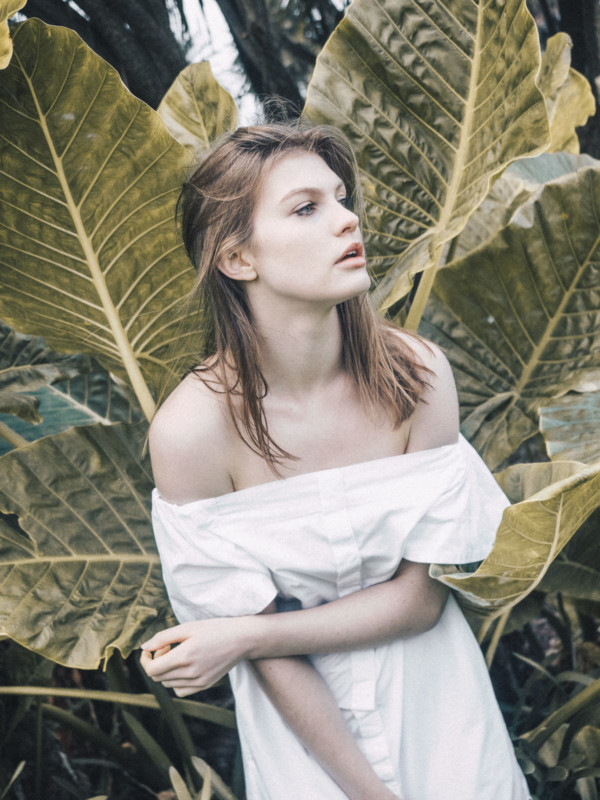
What about a cloudy day? Sometimes the biggest and most impactful changes are to do with the color palette of the image. Here, I made significant changes to the skin tones and colors of the plants, and desaturated the blue channel to make the dress look white. The shadows were pushed way up and the highlights dropped, and contrast pushed back in with the tone curve.
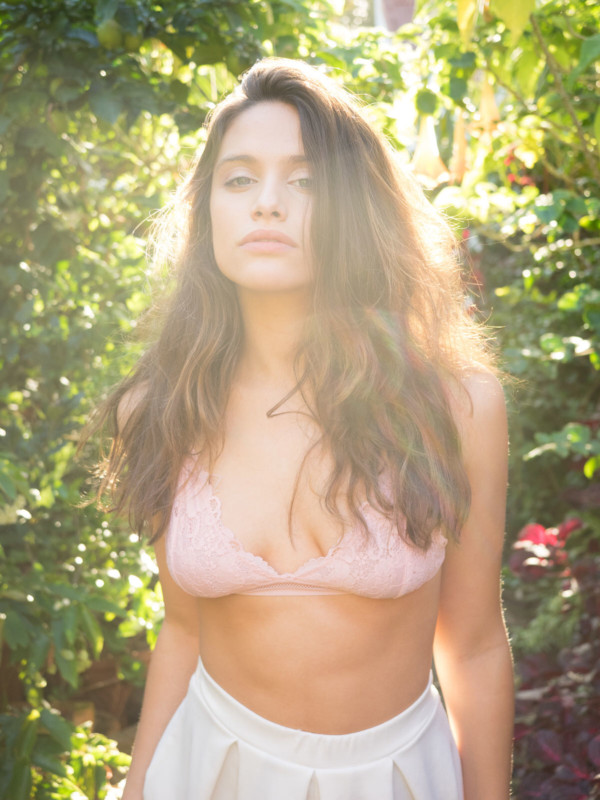
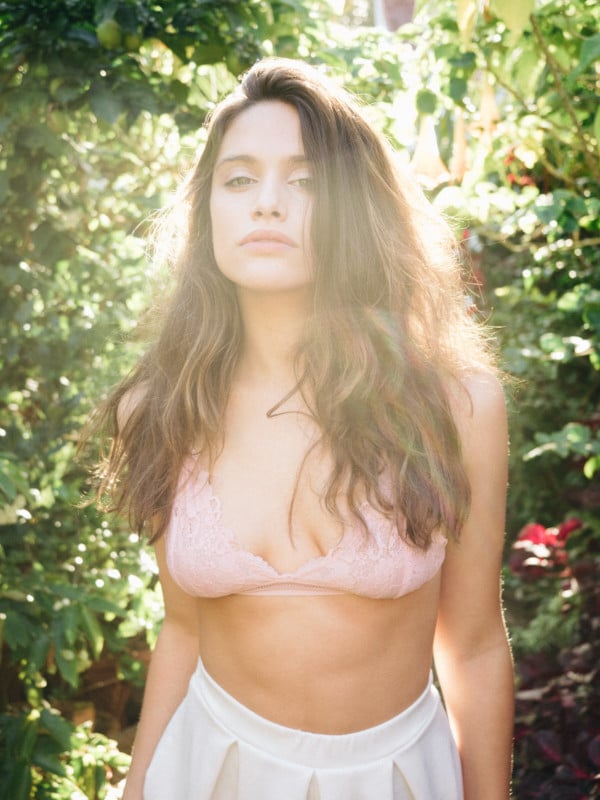
Now, backlit shots are some of my favorites. And as you can see here, they can be left almost entirely alone! I reduced some of the haze and saturation to get a bit more pop on the model. Most of my backlit photos don’t get edited very heavily, because I prefer to keep the golden haze I get from the sun. Since there’s no hard light hitting the model, it can be very flattering.

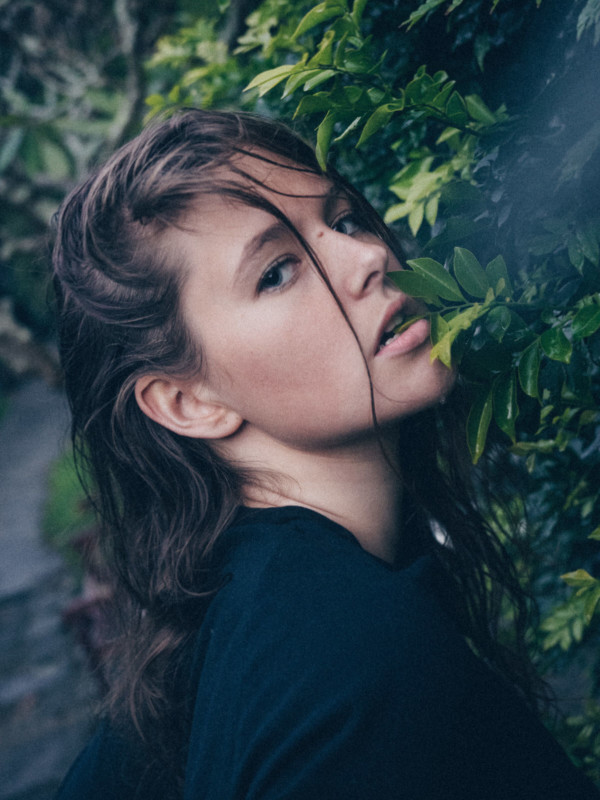
Here’s a really impactful one: I had a sunset (without the sun), with some nice foliage catching some remaining light. I had the model stand right in among the bushes but had her face the cloudy sky where the sun was brightest so that she was hit by clean light with no color cast. If there was any significant light bouncing off the bushes, ground or other objects then it would have introduced unwanted colors to her face – you need to watch that, especially on overcast days.
The edit involved a big drop in the highlights and whites and a massive boost to the exposure and shadows. I dropped the blacks a little to keep the contrast in the image. Add a bunch of character with grain and shift the colors, and you can get a very different, pleasing result.
All major edits were still done in Lightroom (slight exposure adjustments, curves and HSL adjustments to get a more desaturated look, and adding grain). I used Photoshop in this case to touch up some of the skin (on-camera flash produces some harsh shadows) and also increase the crop (with content-aware fill and some clone stamping) to balance out the space above the model.
Final Word
Some of these photos I’ve shared stand on their own very well without any editing, but I choose to edit to maintain a preferred visual style. This is what I meant when I said nailing just one of the aspects can carry a photo to greatness. But for the majority of situations, editing plays a part. And it can be really hard as an aspiring photographer to know where to start when you only see the completed image shared online.
I hope this quick rundown has shown you that capturing a great photo is usually more than just what you do on the day, and achieving the results you’re happy with can sometimes involve a lot of trial and error behind the scenes. Don’t give up, and don’t be afraid to ask your fellow photographers about their process. No doubt you’ll develop your own, but I believe when creatives share it can only increase creativity.
Don’t forget: all this applies to many other types of photography too!

About the author: Aaron Browning is a Sydney, Australia based lifestyle and portrait photographer. The opinions expressed in this article are solely those of the author. You can find more of his work on Instagram @abrownin. This post was also published here.
Credits: Header photo model: Madeleine, @madeleinesarah22. Hair: Jax, @hairbyjax


