


The Starry Sky Snap plug-in* released on August 3, 2022 and it allows you to easily do astrophotography. Shooting the starry sky requires specialized settings, but with this plug-in, all you have to do is press the shutter button once and THETA will automatically analyze the starry sky conditions and take pictures using the optimal shooting settings. Mr. Yamamoto, who planned and developed this plug-in, will introduce us to astrophotography with the plug-in.
*Compatible with RICOH THETA Z1 and V as of August 3, 2022.
Hello, I am Yamamoto and I developed this plug-in. Since the release of RICOH THETA S in 2015, the RICOH THETA series has been known as a 360-degree camera that can capture the entire landscape, sky and all. THETA V, released in 2017, can shoot the same level of detail as S. The flagship model, THETA Z1, is currently the most suitable 360-degree camera in the THETA series for astrophotography thanks to its 1-inch sensor.
Even if you have a 360-degree camera ready and can go to a place where you can see many stars, how should you set exposure, shutter speed, ISO, and other settings? How do you change multiple settings with trial and error? It takes time even for a single test shot. Moreover, sometimes it happens that images you think are okay at night look darker when you later review the images in daylight.
This plug-in solves such problems by allowing you to simply press the shutter button and wait for a moment. Essentially, the plug-in decides the appropriate settings for any kind of starry sky.
If you can see the Milky Way above you in summer, you can capture an image like this.
Post from RICOH THETA. – Spherical Image – RICOH THETA
When you can see a lot of stars with your eyes, you can easily take a picture like this. The shutter speed was 60 seconds in the image above.
At night when the sky is a little too bright to see a lot of stars, such as when there is a crescent moon low in the sky, you need 10 to 20 seconds to shoot (it may seem that the moon is full, but it is actually a crescent moon in the image).
Post from RICOH THETA. – Spherical Image – RICOH THETA
On a night with a bright moon, it takes about 5 to 8 seconds (the shadow of the tripod is clearly visible on the ground due to the moonlight).
Post from RICOH THETA. – Spherical Image – RICOH THETA
Since THETA cannot be held for such a long time without causing motion blur in the image, be sure to use this plug-in with a tripod or similar device.
THETA can be held in any position because the zenith correction mechanism is activated and it saves images with the sky at the top and the ground at the bottom. When this plug-in determines the brightness of the night sky, it also checks the sky direction regardless of THETA’s position.
In the example images, I took photos so that the strong moonlight would not enter the area used to determine the brightness of the sky as shown in the figure above, but even if the moon does appear in the area, the shooting settings are set to reduce its effect as much as possible. A little bit of cloud cover is okay as long as you shoot in an area with as much open sky as possible, ensuring that tree branches or buildings do not interrupt the view. Of course, please feel free to use the plug-in anyway that works for you!
Starry Sky Snap shows the brightness of the sky
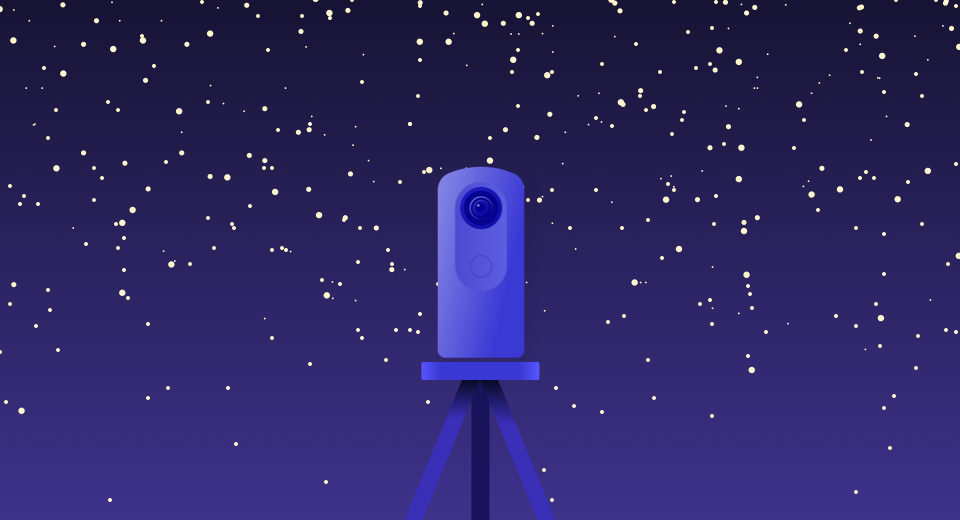
Set up your THETA on a tripod, activate Starry Sky Snap, and press the shutter button.
All you have to do is wait and then you can take images like the ones shown so far. But there is something I noticed in these examples: there are many variations in the brightness of the night sky. Even the shutter speeds show a very wide range.
Perhaps, for those who are not accustomed to night photography, the sky at night is just ‘dark’. I think few people realize the brightness of the night sky changes even during a single night, just as it does from morning to day to evening. This is because human vision automatically compensates for these subtle changes throughout the night.
In fact, in the absence of sunlight, we are affected not only by changes in the moonlight (its phase and position in the sky) but also by the artificial lights of nearby towns or cities. To further complicate things, the brightness of the night sky differs depending on the date, time, and location. Simply copying the shooting settings for another location, date, and time will not produce the best results. This is one reason why beginners find it difficult to photograph the starry sky.
If you read this explanation along with the example photos, you may understand. However, even if all you have to do is press the shutter button, it will take time to be able to judge the sky conditions at the place and time when you actually take pictures.
So, this plug-in displays the state of the sky as follows after shooting. In the case of THETA Z1, text is displayed on the OLED screen on the body, while in THETA V, the results are indicated by the color of the radio lamp.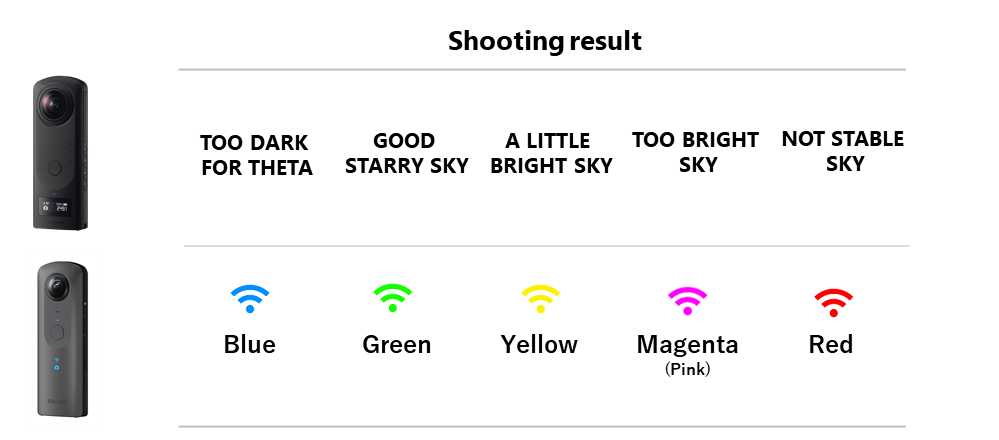 The approximate brightness of the night sky relative to the display is as follows.
[TOO DARK FOR THETA] → Suitable for starry photography but too dark for THETA.
[GOOD STARRY SKY] → Suitable for starry photography (including a low crescent moon).
[A LITTLE BRIGHT SKY] → A little too bright to photograph the starry sky (quarter moon or gibbous moon)
[TOO BRIGHT SKY] → Too bright to photograph the starry sky (full moon or high moon, etc.)
[NOT STABLE SKY] is displayed when an extreme change in brightness is detected such as if the lens is illuminated by a strong light or covered by something during shooting and does not indicate the state of the sky.
I hope that the sky state will be useful as a reference for choosing a location, date, and time when you want to capture stars.
However, if you visit a place that seems dark to you and try photographing it on the night of the new moon, you may find that “TOO BRIGHT SKY” is displayed. This is likely because of light pollution from a nearby city.
If you want to avoid such a situation, it is a good idea to choose a shooting location by referring to the following resource, which shows the effects of city lights on the night sky.
Light pollution map:
https://www.lightpollutionmap.info/
For example, this map shows central Japan. As a rule of thumb, the Milky Way in summer can be captured reasonably well in the blue regions on the map, while green areas are less suitable.
More astrophotography support functions available for THETA Z1
The shooting settings can be displayed on THETA Z1 by pressing the Fn button after shooting. Each time the Fn button is pressed, the display alternates between ‘Night Sky Shooting Result’ and ‘Shooting Settings.’
This is made in consideration of the following two things.
(1) Re-shoot the image with your preferred shutter speed and ISO with THETA
This plug-in prioritizes image quality so it does not raise the ISO sensitivity too high. For example, an image shot with this plug-in might be ISO 1600, 60 seconds, but some people may want ISO 3200, 30 seconds.
You can see the shooting settings right after without downloading images, so if the ISO sensitivity and shutter speed is not what you want, you can immediately exit the plug-in and shoot manually by yourself.
When you want to take interval shots to create a whole-sky starry time-lapse, the plug-in can be useful for figuring out the ideal settings before the time-lapse.
(2) Use it as a reference for astrophotography with other cameras
Even though THETA Z1 has a 1-inch sensor, most of the interchangeable lens cameras use larger sensors with better high-sensitivity image quality.
If you also have one of those cameras, you can use the setting recommended by this plug-in as a reference when shooting the starry sky. You can reduce the amount of trial and error necessary, and in some cases, you may be satisfied with the settings as they are.
The following information is displayed on THETA with this plug-in: aperture value, ISO sensitivity, shutter speed, and white balance. I recommend referring to ISO and shutter speed as they are and setting the aperture value to the maximum aperture (the smallest value) of your lens as a test shot. I recommend the maximum aperture value of the lens be brighter than f/3.5, and the focal length should be wider than a 24mm lens (35mm equivalent).
Those knowledgeable about photography might wonder if the settings would result in a darker image if the lens has a smaller aperture. Certainly this is true when shooting in favorable conditions where there is little influence from street lights, or when shooting only the sky almost directly above. However, unlike THETA, which captures images in all directions, a general camera captures a limited area. If you want to capture a view of the ground and the starry sky in a single image with a wide-angle lens, you will be shooting the sky at a point below that which THETA uses to determine the brightness of the night sky. The sky close to the ground is usually brighter than the sky directly above due to the influence of city lights. This will cancel out the difference in brightness (aperture) of the lenses in many cases. This makes ISO sensitivity and shutter speed of THETA convenient to use as initial settings.
When trying to figure out the settings, do the following…
(2)-1 Determine the brightness
Depending on your preference, determine the brightness of the picture by changing either the ISO or the shutter speed.
(2)-2 Determine the balance between ISO (image quality) and shutter speed (star movement)
Once you determine the brightness of the picture, you can reduce the ISO while lowering the shutter speed by the same number of stops. Conversely, if you increase the shutter speed the ISO value should be decreased by the equivalent number of stops.
The longer the exposure time, the more the stars will move in the image, so you may want to shorten the shutter speed. However, increasing the ISO will reduce the image quality. You have to find the appropriate balance between the two settings. Depending on your camera, it doesn’t always mean that darker locations are better. You may have to give up a little bit of something.
(2)-3 Select the white balance
Finally, set the white balance as you like. If you can shoot in RAW and edit them later then you don’t need to worry about this step.
In a place with little light pollution and no moonlight, set the color temperature to around 4200K or so. If it is difficult to judge, take multiple shots at slightly different values, and you will have a good idea of what to expect. If there is enough moonlight, you may be able to leave it on auto white balance depending on your camera.
With a good understanding of the meaning of the values, this plug-in can be your guide to starry sky photography.
A small trick to take advantage of the plug-in’s features
This plug-in determines the night brightness only above 60° angle of elevation.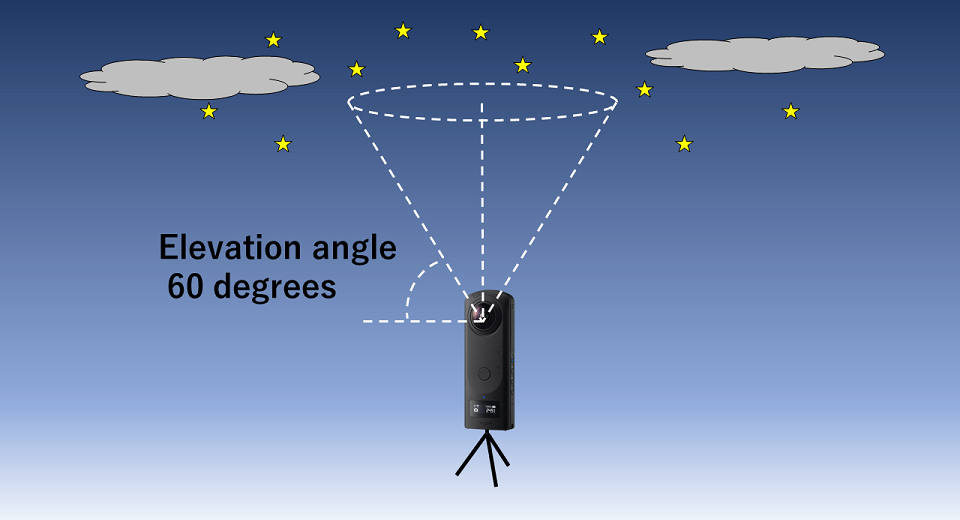 You don’t have to be too strict about turning off the lights as long as the light is not that strong.
Stand THETA higher than your line of sight, use a tripod and also a selfie stick if possible, and light up the ground around THETA during shooting.
The following image is an example shot with a dim light, similar in color to an incandescent light (better to avoid white or bluish light), pointed at the ground and I slowly walked around while taking the picture.
Post from RICOH THETA. – Spherical Image – RICOH THETA
The ground seems bright in this photo, but I actually used a very dim light. In a very dark environment and with dark colored clothing, you will not remain in the image as long as you are walking, even slowly.
In a dark place where the Milky Way can be shot, the ground appears totally black, even though THETA can capture 360 degrees. So, this little accent to the image is my small tip for you!
Enjoy astrophotography with THETA!
This Starry Sky Snap plug-in makes it easy to do astrophotography as long as you can go to a place where you can see the stars. You can also easily figure out the conditions of the sky. You’ll get to feel how precious it is to be able to view and photograph a good starry sky. I hope that you will be interested in the differences in the constellations visible in each season and the movements of the stars during the course of a day. And I hope the plug-in will let you shoot the starry sky as your creativity intends!
You can also utilize RICOH THETA Z1 for referring to the settings displayed after shooting when shooting with normal cameras. So, I recommend using THETA as a companion any time you set out to do astrophotography. There are more and more sightseeing locations, hotels, and places that hold stargazing and photography events. It’s convenient to have one THETA for such events to get more out of them!


