


")

")


L’articolo è riportato dal sito collegato al link che state leggendo. Clic per collegarsi al sito originale.
Clic to view the source link
The XPhase / XPhase Pro is the highest resolution 360 camera as of July 2019. The XPhase is a 360 camera with 25 sensors, each with 8 megapixels, for a total resolution of 200 megapixels. That is almost double the resolution of the previous record holder, which was the Panono (reviewed here), which has 36 sensors, each with 3 megapixels, for a total resolution of 108 megapixels. Moreover, the XPhase is far more affordable, starting at $599 for the regular XPhase and $699 for the upgraded XPhase Pro. This all looks great on paper, but how is it in real life? Is it the best virtual tour camera? Here is a hands-on XPhase Pro first impressions review with samples, detailed analysis and upcoming comparison with Panono (reviewed here), Ricoh Theta Z1 (reviewed here), Aleta S2C (reviewed here), and other 360 cameras, and a tutorial.
Specifications and features
XPhase Sample photos
Workflow and tutorial
— Download the manuals in English
Conclusion; Strengths and Weaknesses
Price and availability
Specifications and Features
| Lenses | 25 lenses |
| Aperture | f/2.2 |
| Field of view | Fully Spherical |
| Sensors | 25 lenses x 1/3.2 inch 8mp BSI CMOS |
| Photo resolution | 16384 x 8192 (134mp) stitched 200 megapixels unstitched |
| Shutter speed | 1/4000 to 1 sec. |
| ISO | TBA |
| Exposure modes | Auto (handheld) or auto (tripod) |
| Self-timer | 5, 10, or 20 secs. |
| HDR mode | 3 shots |
| Stabilization | TBA |
| Storage | USB drive (32GB, optional 64GB or 128GB) |
| Connectivity | Wi-Fi |
| Battery | 3400 mAh Li-Po 250 shots Nonremovable |
| Compatibility | iOS, Android, Windows |
| Waterproof | No |
| Dimensions | Camera: 60mm diameter Handle: 22mm diameter Height: 245mm |
| Weight | 248g |
| MSRP | XPhase: $599 XPhase Pro: $699 |
Key Features
HDR: XPhase can take a 3-shot HDR photo for wide dynamic range.
Genlocked sensors: all 25 sensors are genlocked and synchronized. You can capture moving subjects without ghosting.
Optical flow stitching: XPhase’s software can stitch photos automatically with optical flow stitching, resulting in smooth stitching for both near and far objects.
16-bit PNG lossless format: XPhase Pro can export panoramas in lossless 16-bit PNG format, which offers similar editing flexibility as a raw file.
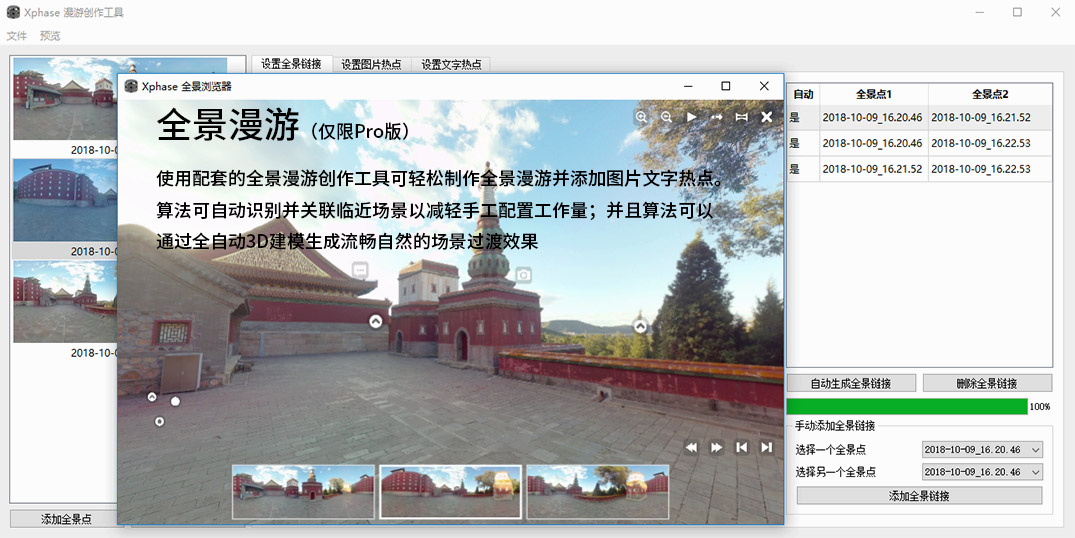
Create virtual tours: Xphase Pro includes software for creating virtual tours.
Please note: the XPhase can only take photos. It cannot take videos.
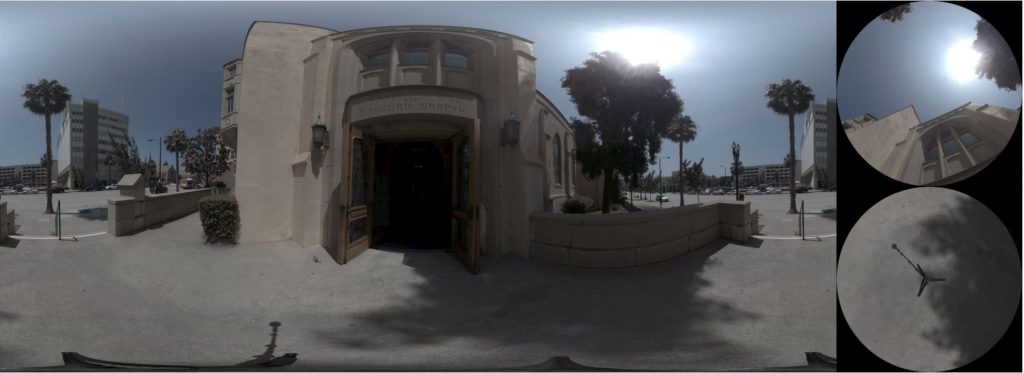
XPhase Sample Photos
Here are sample photos from the XPhase, with edits in Photoshop. Note: there are older sample photos that have unnatural colors. Please disregard them — they were shot before the July 2019 firmware and app update that significantly improved the colors.
XPhase claims a minimum stitching distance of 0.3m. However, I found that when there are objects within 3 feet of the camera, there are usually more stitching errors.
Download unedited sample files here.
Workflow and Tutorial
Standalone
The XPhase can be used by itself. It has only one button, and there are two LED lights. The top LED is the battery life indicator, while the bottom LED is the storage indicator. Both LEDs change color depending on the amount of battery life or storage left, according to the colors of the rainbow: red (less than 20%), yellow (40% left), green (60%), blue (80%), or purple (more than 80%).
Pressing the shutter takes a photo. The camera takes about 10 seconds to process the photo. When it is ready for another shot, you’ll here a double beep. You can also activate the self timer by double clicking (5 second self-timer), triple clicking (10 seconds), or quadruple clicking (20 seconds).
Although there is supposed to be an HDR mode, I have not seen an HDR option in the app.
Smartphone app
The smartphone app can remotely trigger the camera, and can adjust exposure. It can also view and stitch photos but as of July 2019, the app cannot yet export the photos to the phone gallery. The app is currently available only on Android, although they are reportedly working on an iOS app.
To connect with the smartphone app, turn on the camera, and search for the camera’s Wi-Fi signal with your phone’s Wi-Fi. Once connected, launch the XPhase app. On the app, click on the Connect button. The camera should beep 5 times. Within 3 seconds, double-click the shutter button on the camera. The camera and app are now paired and you will see thumbnails of photos from the camera. You can now control the camera.
There is no manual exposure mode. From the app you can only change the following settings:
Handheld vs. Tripod: In handheld mode, it will increase the shutter speed and raise the ISO as needed to reduce blur. In tripod mode, it will use the lowest ISO.
Exposure compensation: +/-2EV, in 1/3 stop increments
Self-timer: 5 seconds, 10 seconds, 20 seconds, or none.
There is no live preview either, so I just have to trust the exposure algorithm, which is quite aggressive and has a tendency to blow highlights. I usually apply a -1EV or sometimes a -2EV adjustment.
The smartphone app can stitch the photos and share them to XPhase’s website, but there appears to be no way to directly save the stitched file to your phone’s gallery for uploading to other sites.
Desktop app
The stitching process can be a one-step process in the desktop app. The XPhase takes photos and saves unstitched in a proprietary .ORI format. From there, you can use the PanoManager app to stitch the ORI files into either PNO stitched files (another of their proprietary formats), PNO + JPG, or 16-bit lossless PNG. If you stitch to PNO + JPG, the JPG is ready for upload to 360 photo sharing sites, complete with 360 metadata. On the other hand, the PNG format is most similar to Raw and is the best choice if you want to edit your photos (it is available only for XPhase Pro). When stitching as PNG, you can adjust the RGB values, and the contrast. Unfortunately, you won’t be able to preview the effects of your choices, so you will need to set these parameters blindly.

There is also a unique option to render as an expanded panorama (“PNG Output Expansion”). By editing the expanded panorama and then cropping the image to a standard 2:1 equirectangular format after adjustments, you can reduce the seam between the left and right edges.
If you choose the PNO format, you can view them in the PanoViewer app, or convert them into JPG with the PNO2JPG app.
Conclusion: XPhase Strengths and Weaknesses
Here are my preliminary impressions of the XPhase’s strengths and weaknesses for the 3 P’s of the 360 Camera Buying Guide:
Performance / Image quality:
+ Very high detail
+ Very good dynamic range
+ Almost no chromatic aberration
+ Short minimum stitching distance for high resolution 360 camera (around 3 feet)
o Good stitching with minor stitching errors
– Limited exposure control
– Susceptible to flare
– On my review unit, one or more lenses seem slightly out of focus (or it could be a stitching error…)
Practicality / convenience:
+ Self-timer can be used without a phone
+ Option for one-step stitching process
+ Batch exporting
+ High speed USB drive can transfer files quickly
+ Option to minimize seam line by rendering as expanded panorama
– 30 sec. startup time.
– No live view
– No stabilization yet
– Cannot export 360 panorama to phone gallery
– No video capability
– No time lapse capability
Price / affordability:
+ Very affordable compared to other prosumer 360 cameras.
Again, these are just my preliminary observations, based on firmware . I will post a comparison against the Theta Z1, Aleta S2C, and a DSLR panorama.
Price and availability
XPhase is now available in two versions: the standard version for $599, or the XPhase Pro for $699. It is available from Stabilizer Pro. I will keep this page updated with any improvements to the camera. If you have any questions, please leave them in the comments. The official webpage is here. Join the XPhase Group on Facebook here.
The post XPhase / XPhase Pro Review: highest resolution 360 camera with 200 megapixels appeared first on 360 Rumors.


